Getting Help

|
|
Access new release updates |
|
|
Access to view alerts. Alerts notify you when a report is ready for download, among other notifications. When you run a report, a red gear will typically appear in the top right corner between the bell & the question mark icons. This lets you know that a report is being processed. Once the report has been processed, the gear icon will disappear, and the bell will turn red, letting you know you have a file ready to download. You may also receive an email informing you that a report has finished processing and is ready for download. Click on ‘Dismiss’ to get rid of the notification. |
|
|
Access to the help desk. A pop-over will appear offering the following options:
|
|
|
Access to help videos. |
 |
Access further the Application Actions and Options Menu Notice a new window will open; within it, you will have two tab choices: SchoolData.net Settings and ALE Settings. |


My Account Settings - SchoolData.net
|
Account Settings: Username, Password To Change Password: Click Edit account info to redirect you to an Account Management page. Type in the new password twice and the current password and click Save. |
|
|
Screen Settings: Zoom, High Contrast Mode Recommendation: Enable high contrast mode and enlarge your screen if you have less than perfect vision. |
 |
|
Impersonation and Demonstration: Impersonation, Reference Date, Demonstration Mode. NOTE: For further information, Homeroom Dashboards - Impersonation and Validation Article Logout will allow you to log out from the account you are currently logged into. |
 |
Expanding or Collapsing Form Sections
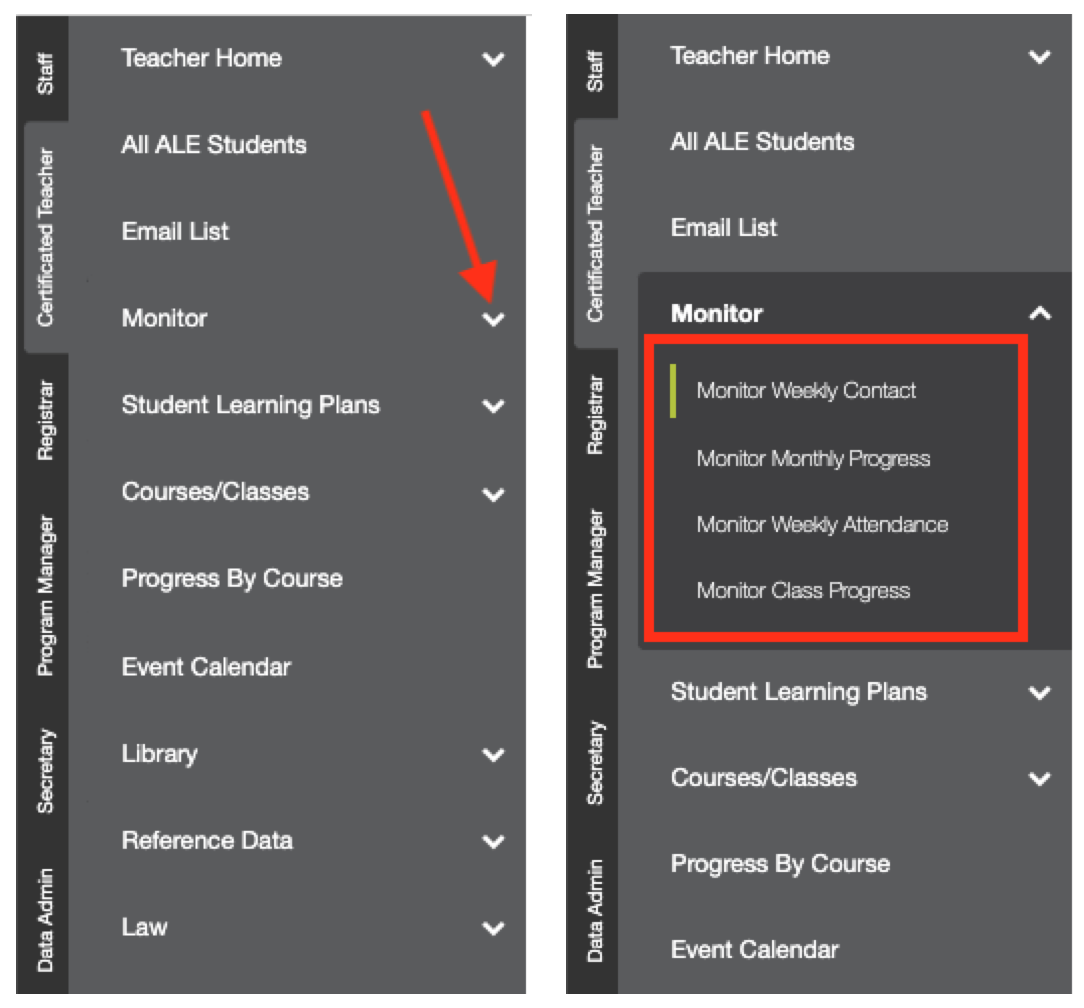
Wherever you see an arrow in the application, click on it to reveal further options under that heading. In this example, clicking the arrow next to ‘Monitor’ in the left-hand navigation expands the menu, revealing additional options.
Gear Icons
The gear icon is designed to display a menu of options linked to a single item. We have several types of gears, as illustrated below.
|
Page Action Gears: top right of the page. Not all pages have Page Action Gears. In this example, clicking the Page Action Gear on the Certificated Teacher Monitor Weekly Contact page surfaces Record Direct Contact, allowing you to simultaneously enter Weekly Contact for several of your students. In this example, clicking on the Page Action Gear surfaces Reports related to the All Classes Table data. |
|
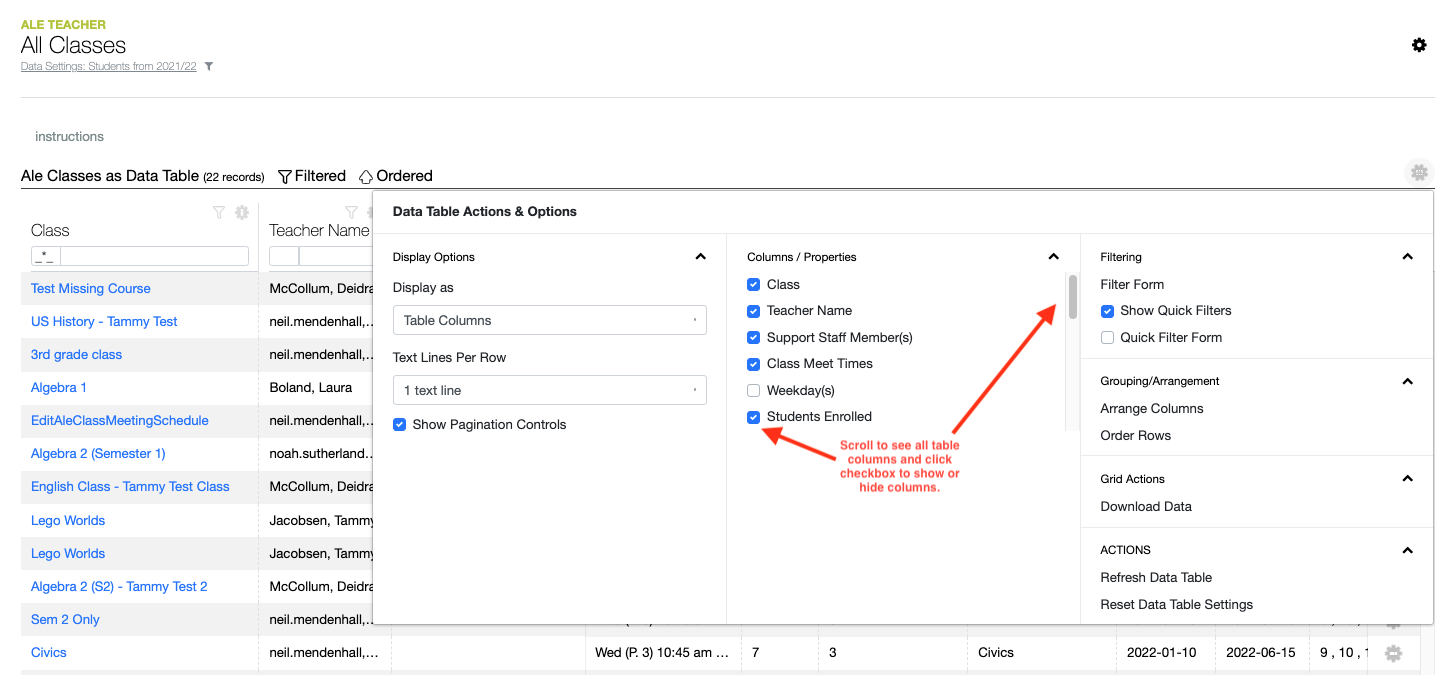
Data Table Actions & Options Gears: Above any data table, top right of the page. It will appear grey until you hover over or click on it. This example shows that users can hide columns, arrange columns, download the table data, etc. |
|
Column Actions & Options Gears: top right of each column. It will appear grey until you hover over or click on it. |
|
Row Actions & Options Gears: Each row of data has its own gear to the right. It will appear grey until you hover over or click on one. Surfaces a list of actions that can be taken for that specific piece of data. |
|
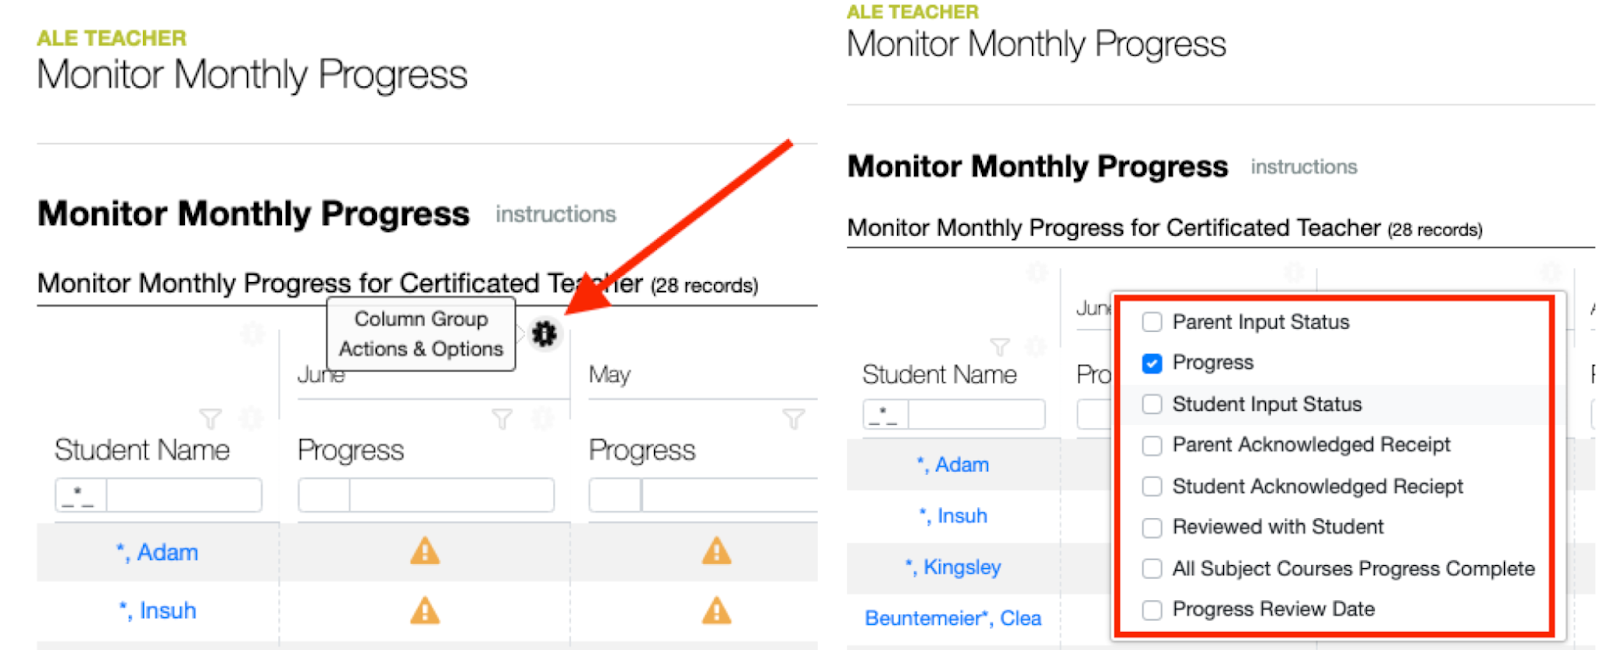
Column Group Actions & Options Gears: Surface additional data for each column group. |


Filters
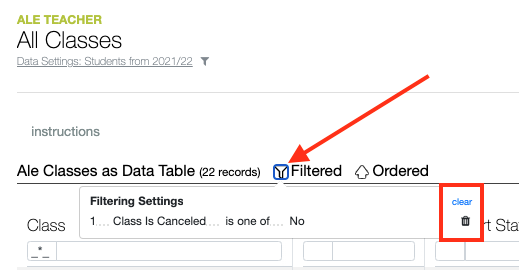
Table Filter: the right of the table name. Surfaces all the filters on a table that are currently on. Clear the filter by clicking on the clear or the trash can icon.
A Column Filter will typically give you a predetermined list of items to select and apply.
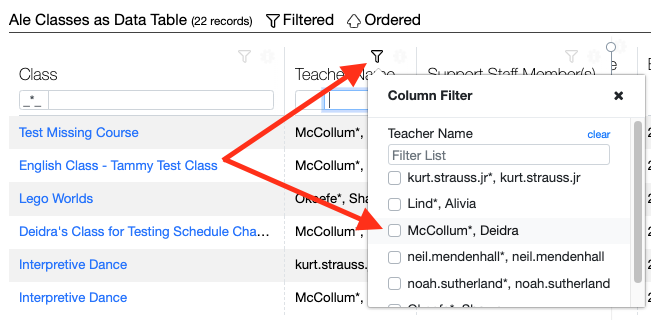
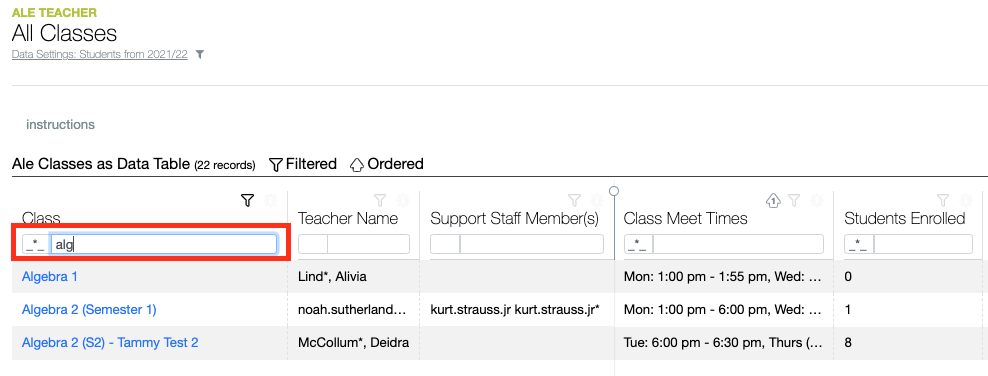
You may also type in the text box at the top of each column to filter or search for specific information.
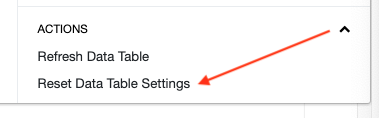
Some tables retain your filter settings. To reset the table to its default settings, click the Table Data Actions & Options Gear, then select Reset Data Table Settings from the bottom-right corner of the pop-up window.
Date Selections
Clicking a date field will open the calendar. Click on a specific date to have it autofill the date field.
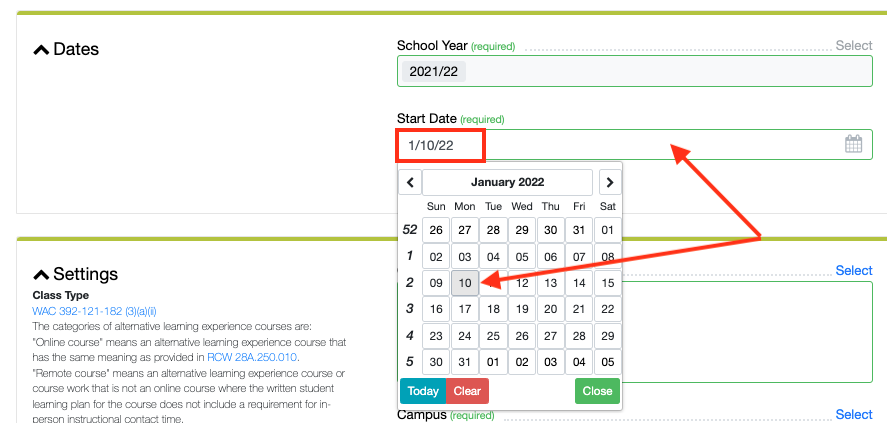
Navigate through the selections using the arrows at the top, or click the month and year to choose from the available options.

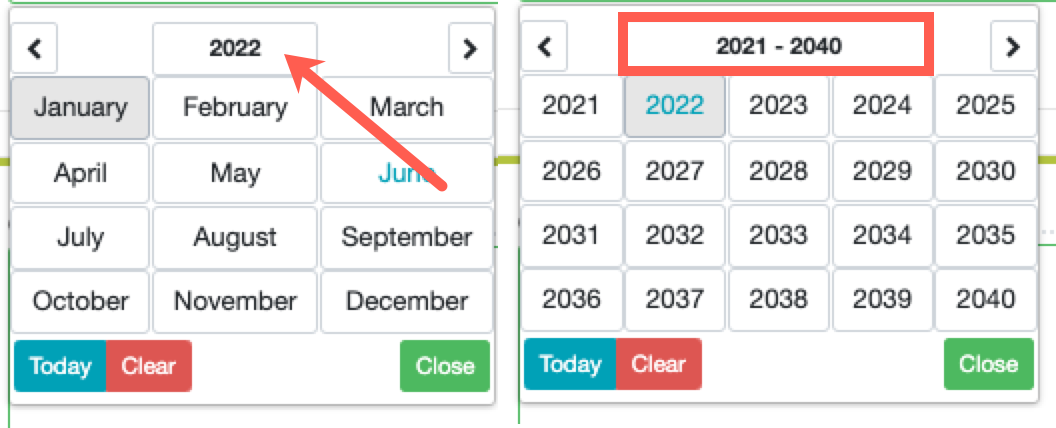
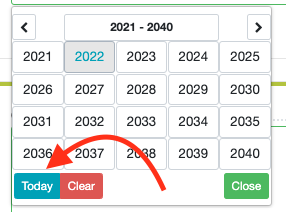
Navigate to Today in the bottom left-hand corner of the calendar.
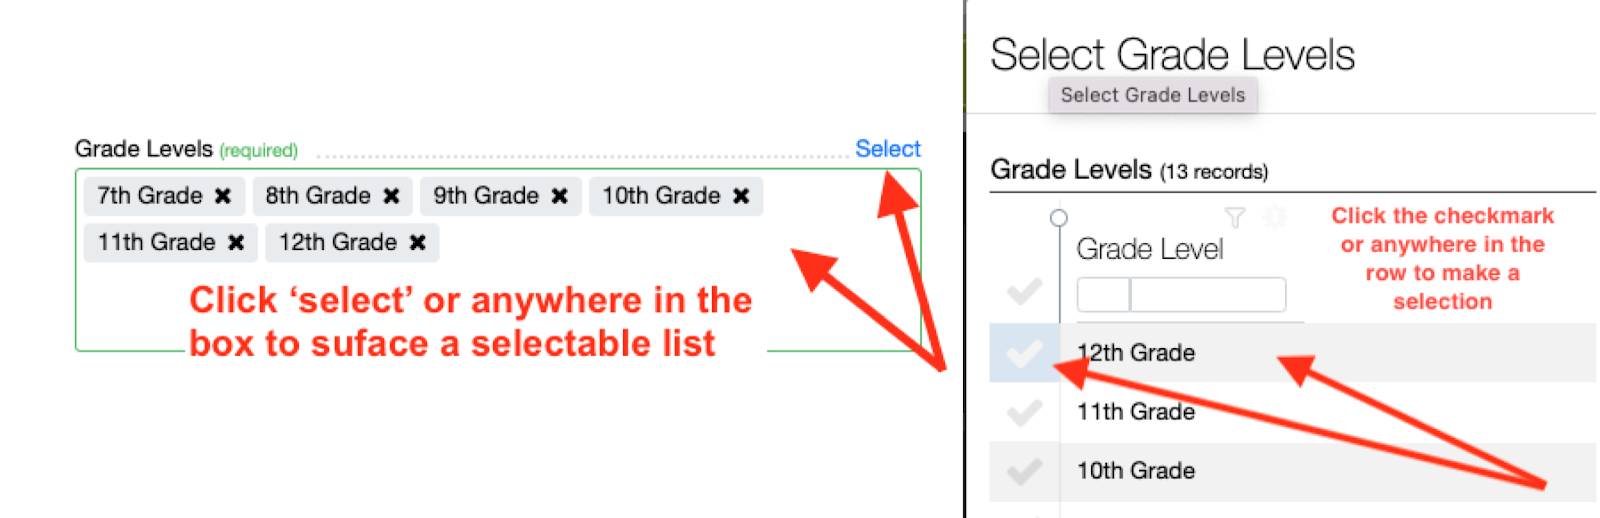
Making Form Selections
Many fields allow you to open a pop-up menu and make form selections. Click Select surface to select a selectable list.
Select Row Actions
Some tables allow you to select one or more rows to take action. A Select Row Actions button appears on the right above the table when one or more rows are selected.
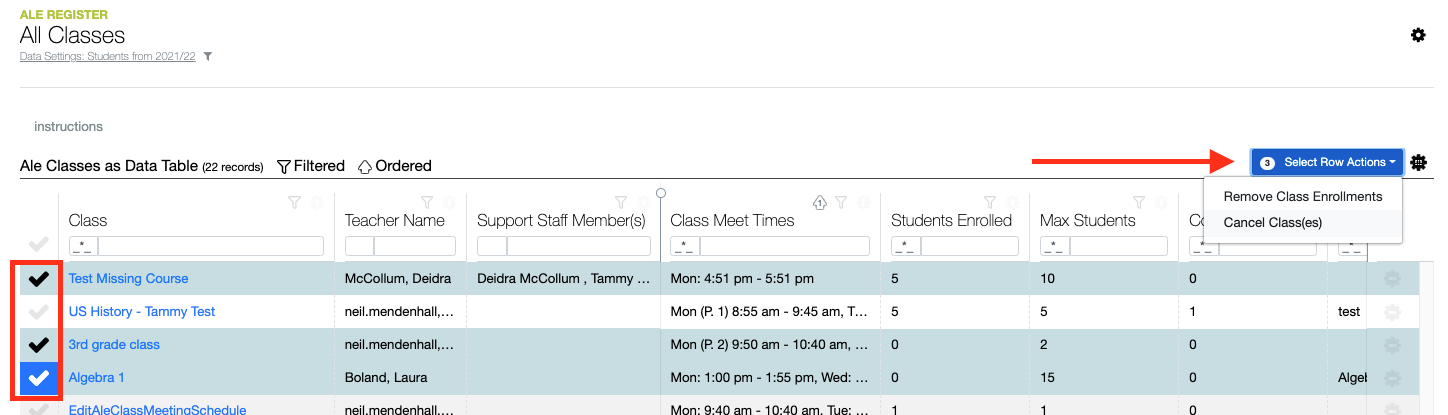
Click the top left checkmark to select all rows in the table. You may also filter the table, then click the top-left checkmark to select only the rows that appear after applying your filters.

Built-in Instructions / Tool Tips
Some pages contain instructions and tooltips.
Hovering over ‘select’ will sometimes surface a cheddar question mark icon. Click the icon to surface the tip and click it again to dismiss the tip.

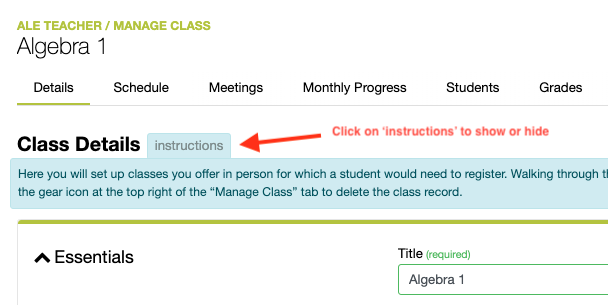
Some pages will have ‘instructions’ that you can click to show/hide important instructions.
Comments
0 comments
Please sign in to leave a comment.