What is a Scanner Alert?
A scanner alert is an alert you can set that will appear when you scan students into your building. Programs that do not scan students into their building can still use it to flag students.
Where do Alerts surface?
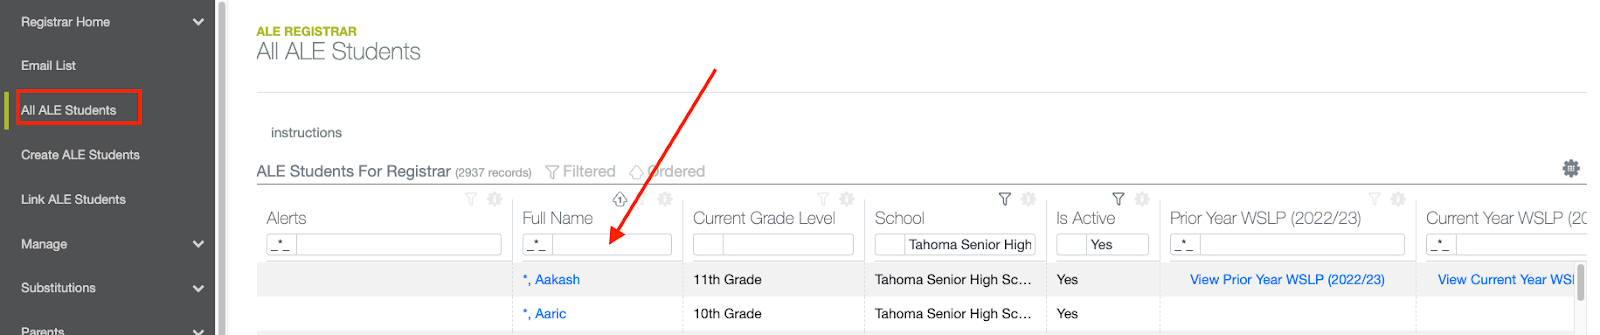
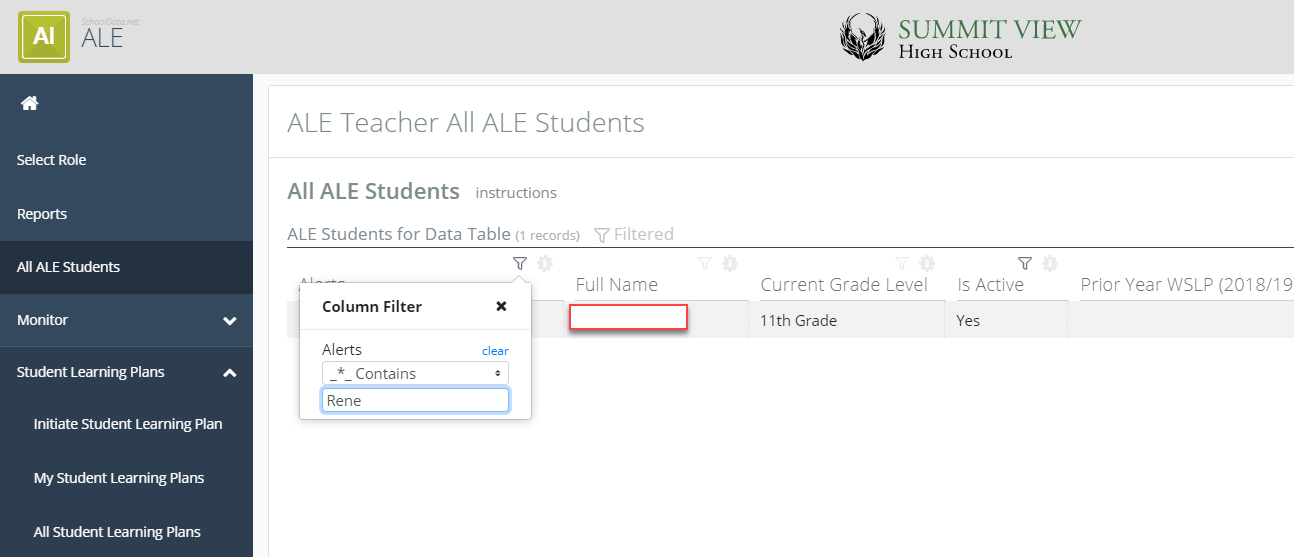
Scanner Alerts surface on the All ALE Students page.
You can add a scanner alert or STOP to a student following these steps.
Go to All ALE Students in the left navigation menu and, using the filters on the name column, filter to find the student for whom you wish to add a stop.
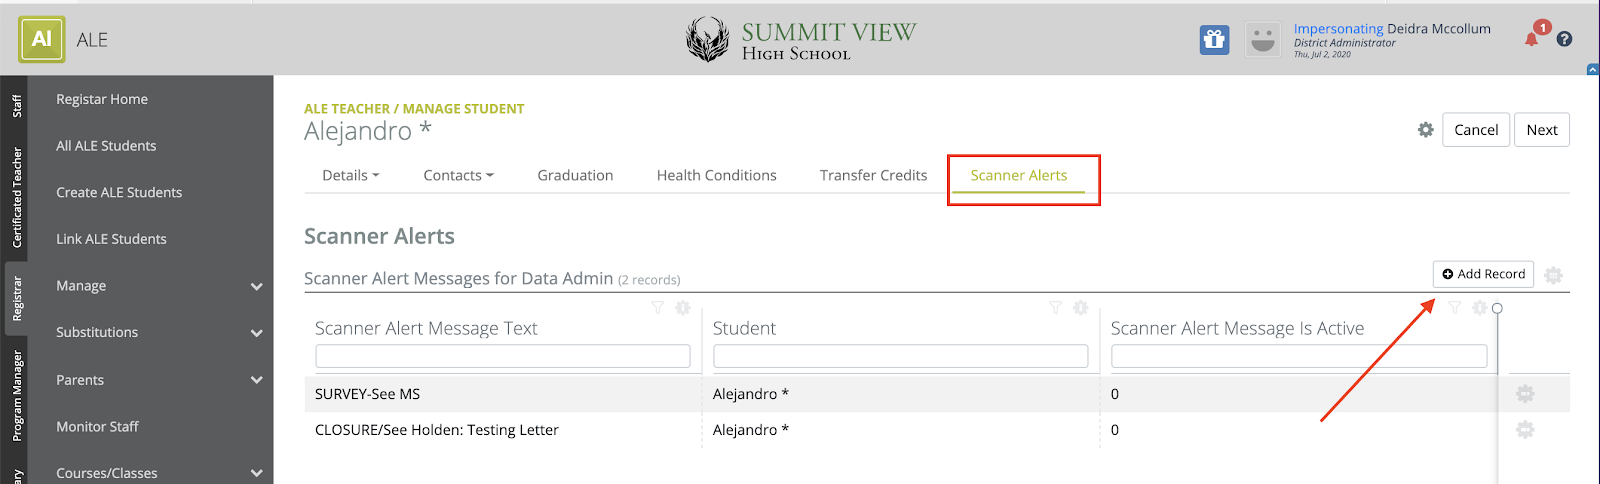
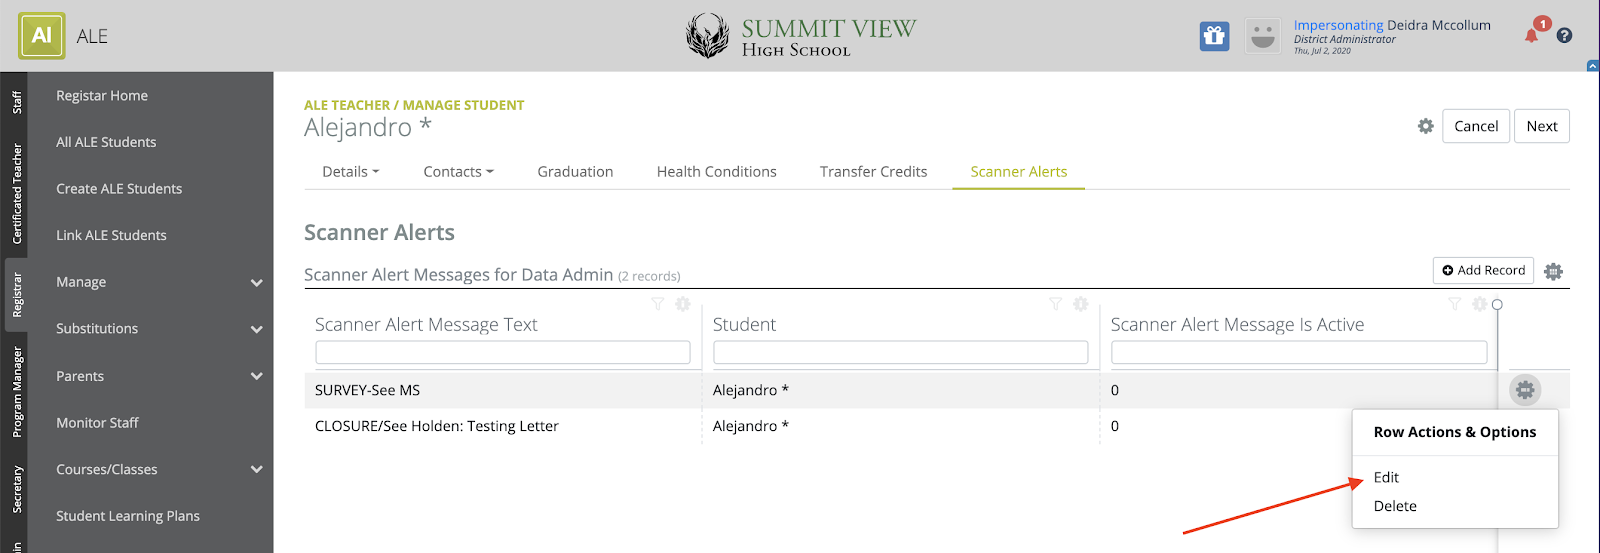
Click on their name to open the Manage Student interface for that student, then click on the Scanner Alerts tab. This is what you will see if no alerts are currently active. You can add a new one by clicking Add Record in the top-right corner.
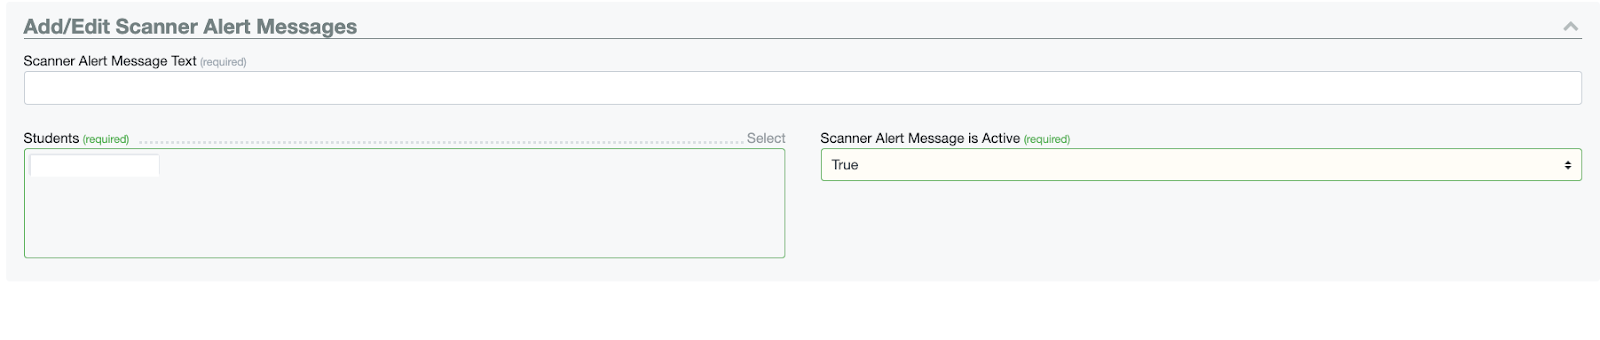
The Add Record modal will open, where the Student (Required) will be auto-selected, and the Scanner Message is Active (Required) selector defaults to True. Enter the Scanner Alert Message Text (Required) and hit Add.
You will now see an active Scanner Alert for the student listed in a table format.
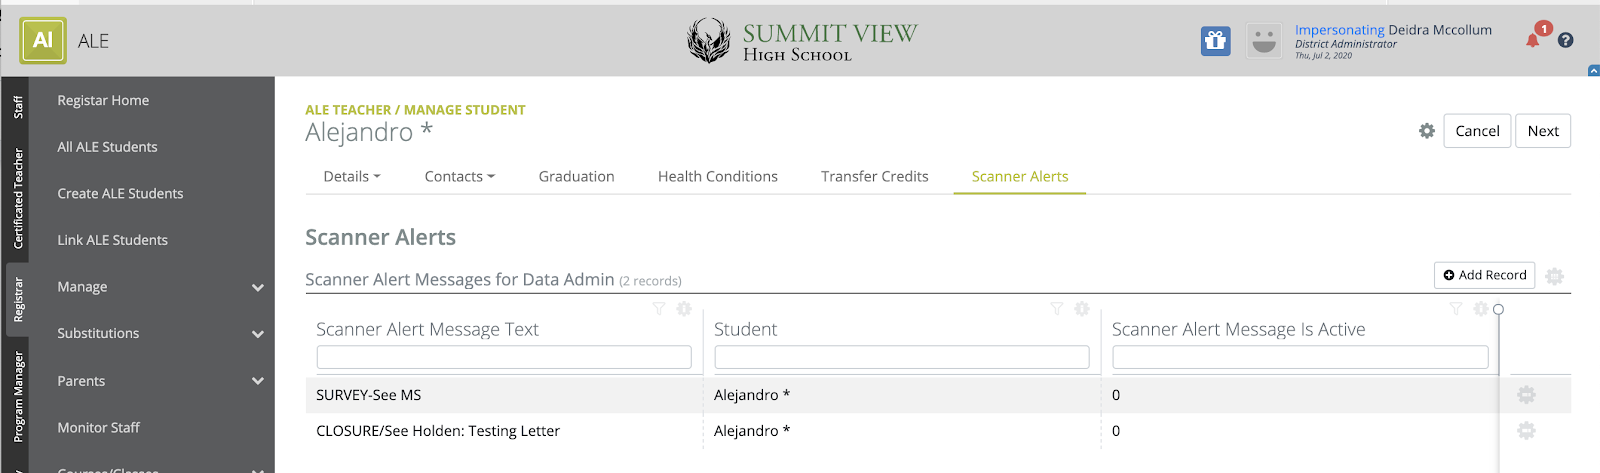
Multiple scanner alerts can be applied to the same student, and all will display.
You can inactivate (yet retain) an alert by clicking on the Row Action & Options gear next to the alert and choosing Edit.
Set the "Scanner Alert Message is Active" toggle to False, then click Update in the top-right corner.

The scanner alert will no longer display, but is retained for future use.
To completely remove a scanner alert, click the Row Action & Options gear next to the alert, then choose Delete.
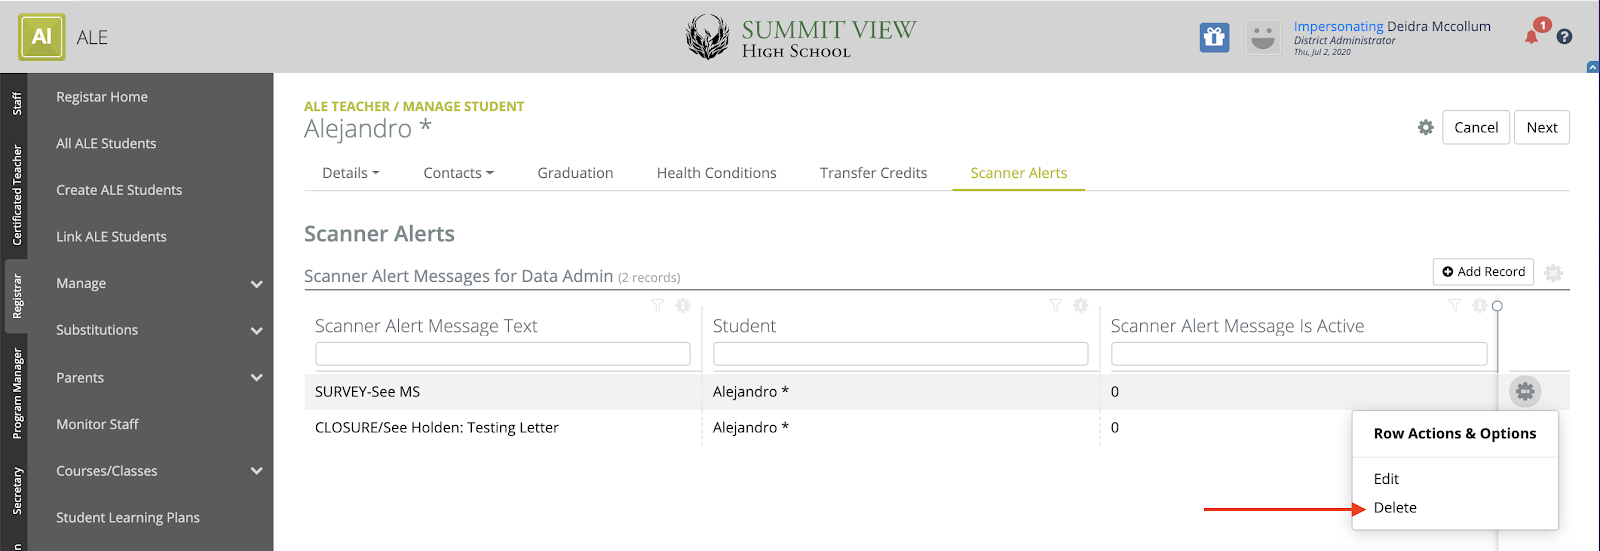
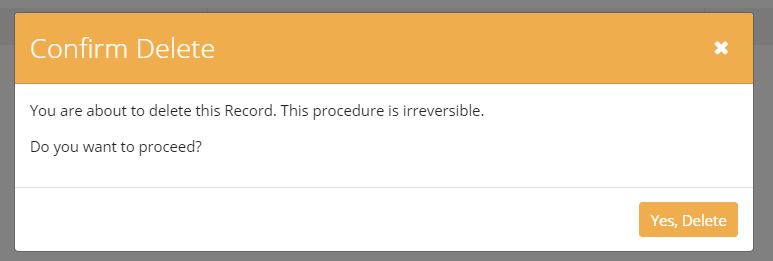
You will see a warning confirming that you want to remove the alert, as this step is irreversible. Click Yes, Delete when you’re ready.
On the All ALE Students page, a column to the far left will display only if one or more students have an active alert with a warning icon.
A scanner alert is an option you can set that appears when you scan students into your building. Programs that do not scan students into their building can still use it to flag students. You can add a scanner alert or STOP to a student following these steps.
- Go to All ALE Students in the left navigation menu.
- Use the filters in the name column to find the student you wish to add or remove.
- Click on their name to open the Manage Student interface for that student, then click on the Scanner Alerts tab.
- You can add a new alert by clicking Add Record in the top-right corner.
- The Add Record modal will open, where the Student (Required) will be auto-selected, and the Scanner Message is Active (Required) selector defaults to True. Enter the Scanner Alert Message Text (Required) and hit Add.
- You will now see an active Scanner Alert for the student listed in a table format.
- Multiple scanner alerts can be applied to the same student, and all will display.
- You can inactivate (yet retain) an alert by clicking on the Row Action & Options gear next to the alert and choosing Edit.
- Set the "Scanner Alert Message is Active" toggle to False, then click Update in the top-right corner.
- The scanner alert will no longer display, but is retained for future use.
- To completely remove a scanner alert, click the Row Action & Options gear next to the alert, then choose Delete.
- You will see a warning confirming that you want to remove the alert, as this step is irreversible. Click Yes Delete when you’re ready.
- On the All ALE Students page, a column to the far left will display only if one or more students have an active alert with a warning icon.
- By hovering over the icon, you can see the alert text. You can also search the text in the alerts using the filter and search icon at the top of the column.
By hovering over the icon, you can see the alert text. You can also search the text in the alerts using the filter and search icon at the top of the column.
Comments
0 comments
Please sign in to leave a comment.