Here, you will learn more about evaluations and other helpful evaluation tools.
Evaluations Role Definitions
In Evaluations, Users have Roles that determine how they access data and interact with the application.
| Evaluator |
Evaluators are responsible for whichever evaluatees are assigned to them. The main functionality available to evaluators is as follows:
|
| Evaluatee |
Evaluatees have the following functionality:
|
| Monitor | Monitors have a read-only role. They can only view tasks that are assigned to them. |
Tools Provided From The Monitor Dashboard
The Monitor Dashboard lists all CURRENT YEAR Evaluators and their Evaluatees, allowing the Monitor to view all of an Evaluator's Evaluatees data, if needed, with READ-ONLY access. Only Evaluations Monitors will be able to access the Monitor Dashboard. Click on the icon next to the Evaluator's name to expand to see the list of Evaluatees.

Detail settings on an Evaluatee
To change any of the following settings on an Evaluatee, click the pencil icon next to the Evaluatee’s name.**

-
A Position Level (e.g., Teacher-Focused Year 5) determines the tasks that are automatically added to the Evaluatee's task list annually.
- Switching should only be done if necessary, as the task list is updated to include any tasks that have already been filled in with data. Tasks with associated data are retained, which may result in duplicate tasks.
- Position Level (Focus Yr1, Focus Yr2, etc.) is incremented according to a standard district setup sequence during the annual rollover process.
- The Primary Evaluator determines who has the Evaluatee on their dashboard. Switching Evaluator will remove the Evaluatee from the current Evaluator's Dashboard and add it to the new Evaluator's Dashboard.
- A Supplemental Evaluator selected adds the Evaluatee to that selected Evaluator's Dashboard and allows them to add or edit any tasks on their list, just as the Primary Evaluator. However, they cannot edit details such as Position Level, Primary Evaluator, or Supplemental Evaluator.
**If Monitors are unable to switch Position Level or Evaluator, please send a request to enable this functionality to support@schooldata.net. This is a district-wide setting.
Printing
Final Evaluations for All Evaluatees
Click the gear at the top right of the Monitor Dashboard. Choose Print All Evaluatees.

On the pop-up that appears, select options to include or exclude. The print defaults to the current year. If needing a previous year, change the school year at the bottom. Once ready, the generated PDF can be accessed through the application notification or via the email sent to the logged-in user.

Printing Final Evaluations for a specific Evaluator’s Evaluatees
Click the printer icon in the row of the specific Evaluator you would like to print all their Evaluatees.
Like above, a pop-up appears. Select options to include or exclude. The print defaults to the current year. If needing a previous year, change the school year at the bottom. Once ready, the generated PDF can be accessed through the application notification or via the email sent to the logged-in user.
Viewing or Printing a Single Evaluatee’s Final Evaluation
Click the magnifying glass icon next to the Evaluatee to access their Evaluation Record.
Once it opens, click the Summary tab. By default, the current year's Summary & Final Evaluation information shows. Click on the school year dropdown to switch to previous years. Click the Action Gear icon in the Summary area to print. On the pop-up, select what you would like to include in the print. A PDF is generated and accessible via the application notification or the email sent to the logged-in user when it is ready.

Useful Applications Outside Of Evaluations
Some applications aren’t directly linked in the Evaluations application, which can provide useful tools to staff. Specifically configured or compiled Evaluation information in these other applications can provide reports to be filed into a staff folder or submitted to the state. The two most useful below can be found in the Data Extracts (DE) bundle:
- Reports (direct link https://[yourdistrictname].schooldata.net/v2/report-manager)
- Data Tables (direct link https://[yourdistrictname].schooldata.net/v2/data-table-manager)
Since Evaluations are part of the Human Resources bundle when in the application, the bundle icon (HR) will be displayed on the left of the screen. To access the Data Extracts bundle and its applications. Locate and hover over the DE bundle icon on the right side of the screen. Click the "Learn More" link on the application.

Evaluations Specific Reports
The Reports (Rp) application provides users with overall group or single-user PDF reports. Reports offer options for many other SchoolData.net applications; the ones specific to Evaluations are listed below.
- Evaluatee Position Level Path Report
- Final Evaluation 4-Year Report
- Historical Evaluation Summary
Click Create New Report on the left navigation panel to locate any of these Reports.
Helpful Resource: Reports Guide

Click the Browse Category button of the Evaluations Custom Reports.

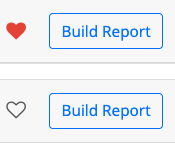
To generate and download documents from a Report, click the Build Report button next to your desired Report.
Select options on the screen that are relevant to your needs. Click the "Save and Generate" dropdown and choose either "Generate Report" or "Save Configuration." A PDF or XLSX workbook will be generated and accessed via the application notification that appears when it is ready, or via the email sent to the logged-in user.

For quicker access to a Report, add it to My Reports. Click the empty heart icon to turn it red. From then on, any favorited Report can be found in My Reports.

Evaluations Specific Data Tables
The Data Tables (Ta) application provides users with reports in an Excel spreadsheet format. Data Tables offer options for many other SchoolData.net applications, so below are the ones specific to Evaluations:
- Evaluation Criteria by Task Template
- Evaluation Task Completion
- Evaluation Year Summary
Click Create Data Table on the left navigation panel to locate any of these Data Tables.
Helpful Resource: Data Tables Guide

Click the Browse Category button next to Data Extracts.

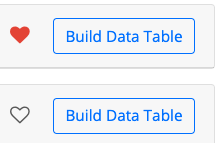
To generate and download data from a Data Table, click the Build Data Table button next to your desired data table.
Select options on the screen that are relevant to your needs. Click Save and Generate Data Table.

It provides data for review or to scroll through on the screen that appears. Click Download XLSX on the" left side to download the spreadsheet into your files, or use the Save" o"ption on the right side of the screen to save and name it.

Add it to My Data Tables for quicker access to the data table. Click the empty heart icon to turn it red. From then on, any favorite Data Table can be found in the like-named category in My Data Tables.

If you need help, contact a customer support representative by emailing: support@schooldata.net

Comments
0 comments
Please sign in to leave a comment.